
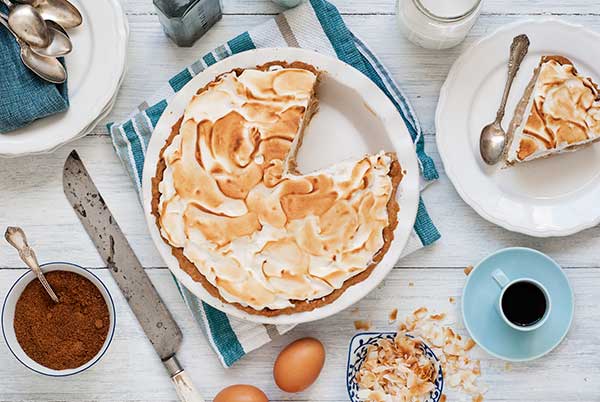
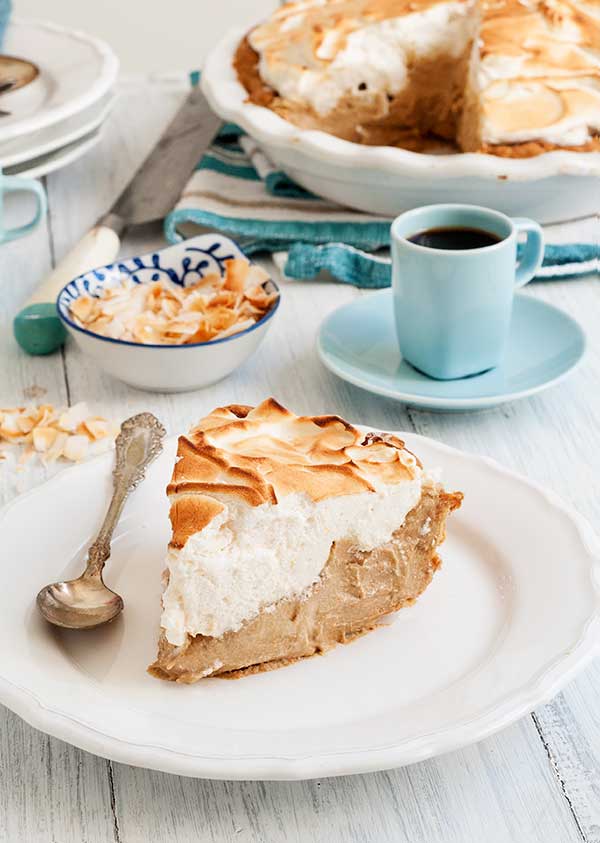
Gluten Free Paleo Coconut Cream Meringue Pie Recipe
This is not your mama’s coconut cream meringue pie! This Gluten Free Paleo Coconut Cream Meringue Pie Recipe is gluten, grain, dairy, and refined sugar free, paleo, and well … pretty darn amazing! Not to mention, impressive as all get out.
Before you look at the recipe and start thinking there are too many steps to this pie and decide it must be complicated, know this – there are basically just three steps; crust, filling, meringue. And these steps are not very complicated. You just need to take it one step at a time. Kind of like how one goes about changing their life for the better – one step at a time. (I’m not saying this pie will change your life but I’m not saying it won’t either!)
Also, to make this pie you need to think ahead a little. You have to get a can of coconut milk really cold by placing in the fridge for about 24 hours. And you need to let the filling cool and set for a few hours. So it is not a “hmmm, I’m having dinner guests in a couple hours, I think I’ll whip up a paleo coconut cream meringue pie for dessert” kind of pie. But that’s ok, not everything in life needs to provide instant gratification.
Let’s break this down step-by-step.
First, the crust.
I wanted the crust for this pie to be thinner and more delicate than other almond flour crusts I have eaten. Usually they are too clunky for my tastes. So there is no egg in this recipe and you will notice no liquid. I basically kneaded the dough to allow the natural oils from the almond flour to come out and help hold the dough together. If your crust is just not cooperating, try wetting your hands with some water and kneading it – that should provide just enough moisture.
The bad news on this crust is that it looked like a hot mess when I was rolling it out. The good news is that it was so easy to smush any cracks together. And as with kneading it together, if need be just moisten your hands and press any cracks in the crust back together. Then I baked the crust first and let it cool completely before filling. The great news is that this crust was exactly what I wanted – thin, crisp, sweet, and delicious!
Ok, now the filling.
It is basically just a coconut curd lightened up with some whipped coconut cream. Nothing too difficult here.
The coconut curd is made by cooking coconut milk, coconut sugar, eggs, and egg yolks over simmering water, just like making custard. To finish it off, I whisked in some vanilla and organic palm shortening. The shortening does what butter would do, gives the curd a silkier texture.
To make the whipped coconut cream, you need to put a can of full fat coconut milk (I prefer Thai Kitchen organic coconut milk – it seems to be creamier than others and produces really great “whipped cream”) in the fridge 24-48 hours ahead of time so that the cream solidifies on top and is easy to separate from the coconut water. It’s the cream that you are going to whip.
(Confession: I NEVER think to put a can of coconut milk in the fridge 24 hours before I am going to use it so here’s my shortcut – I put it in the freezer for 4 hours and then refrigerate for 12 hour or so. Does the same thing but you have to be careful not to fully freeze the coconut milk.)
Then you whip up the cream in a mixer with some coconut sugar and a bit more vanilla. The coconut cream will increase in volume by quite a bit. If you find that your cream doesn’t seem to be increasing in volume as much as you think it should, add a little of the coconut water just a spoonful at a time. Be careful not to add too much or you will defeat your purpose and deflate your cream.
Finally, the meringue.
You will have some egg whites left over from making the coconut curd, so you simply whip them with some honey and a touch of cream of tartar to make a refined sugar free meringue. Then you top the pie with it, stick in under the broiler for a minute and voila! Prepare to impress.
I think even your mama will be impressed!
P.S. I don’t always care for the texture of shredded coconut but if you can’t live without it, simply stir in ½ cup of shredded unsweetened coconut into either the filling or the meringue. You can use toasted or un-toasted in the filling but use un-toasted if adding to the meringue.

Gluten Free Paleo Coconut Cream Meringue Pie Recipe
Ingredients
Pie Crust
- ¾ cup finely ground blanched almond flour
- ¾ cup tapioca starch or arrowroot flour plus more for rolling
- ¼ teaspoon kosher salt
- 3 tablespoons honey
- 3 tablespoons organic palm shortening
- Dried beans or pie weights
Coconut Cream Filling
- 2 (13.5 ounce) cans full fat coconut milk
- 3 large eggs
- 3 large egg yolks
- ¼ teaspoon kosher salt
- 1 cup plus 2 tablespoons Wholesome! Organic Coconut Palm Sugar divided use
- 3 teaspoons pure vanilla extract use divided
- 2 tablespoons organic palm shortening
Meringue
- 3 large egg whites
- 1/8 teaspoon cream of tartar
- 2 tablespoons honey
Instructions
Pie Crust
- In a large mixing bowl, whisk together the almond flour, tapioca starch or arrowroot flour, and salt, making sure there are no lumps. Add the honey and shortening and mix in. The mixture will be crumbly. With your hands, knead the mixture into a ball in the bowl. If needed, you can moisten your hands with a bit of water if the dough does not come together. Flatten the dough ball into a disk and wrap with cling wrap. Refrigerate for 15-30 minutes.
- Preheat oven to 325 degrees. Lightly grease a 9-inch pie pan.
- Place a piece of parchment paper on a work surface. Dust paper with tapioca starch or arrowroot flour. Place the dough on top, dust with more starch or flour and cover with another piece of parchment paper. Roll the dough into a circle about 1/8-inch thick and a bit larger than the pie pan. Peel off the top piece of parchment, set the pie plate on top of the dough, place hand under the bottom piece of parchment and flip the whole thing over. Gently press the dough down into the pie pan then peel off the parchment paper. Push any cracks together with fingers. With a fork, pierce the bottom of the crust all over.
- Crumple one of the pieces of parchment paper up, place it on top of the dough in the pie pan, spread it out evenly and fill with dried beans or pie weight. Bake for 15 minutes, remove the parchment and beans or pie weights. Bake for another 10 minutes or until the crust is set and golden brown. Let cool completely.
Coconut Cream Filling
- 24-48 hours before preparing the filling, place one can of coconut milk in the refrigerator. Leave the other can at room temperature.
- Boil a couple inches of water in the bottom of a double boiler or a pan and place mixing bowl on top without the bottom of the mixing bowl touching the water.
- In the top of the double boiler or in a large heat-proof mixing bowl, whisk together the eggs, egg yolks, and salt. Gradually whisk in 1 cup coconut sugar. Whisk in one can coconut milk. (NOT the can that has been chilled in the refrigerator).
- After the water has come to a boil in the bottom of the double boiler, reduce heat so that the water is barely simmering. Place the bowl with the egg mixture over the barely simmering water being careful not to let the bottom of the bowl touch the water. Cook the mixture, stirring with a spatula every minute or so, for 20 minutes or until thickened. You will need to stir more often as the mixture cooks. Take the mixture off the heat and whisk in 2 teaspoons vanilla. Whisk in the 2 tablespoons of shortening, one tablespoon at a time. Each tablespoon of shortening should be fully dissolved.
- Strain the mixture into a clean bowl through a fine mesh strainer. Let the mixture cool then cover with a piece of cling wrap, placing the cling wrap directly onto the surface of the coconut mixture. Refrigerate until fully cooled, about 4 hours.
- From the can of the refrigerated coconut milk, scrape off the solidified cream from the top, saving the coconut water underneath. Place the cream into the bowl of an electric mixer with 2 tablespoons coconut sugar and 1 teaspoon vanilla and whip on high speed until the cream is thick and has increased in volume, about 2-3 minutes. If the coconut cream does not seem to be increasing in volume, add some of the reserved coconut water, 1 teaspoon at a time and beat some more. Be careful not to add too much coconut water. Save the rest of the coconut water for another use.
- Whisk the chilled coconut curd then add the whipped coconut cream and whisk together. Spread filling into the cooled pie crust.
Meringue
- In the bowl of an electric mixer fitted with the whisk attachment, combine the eggs whites, cream of tartar, and 2 tablespoons honey. Start the mixer on low until the ingredients are combined then increase to high and beat until the egg whites are glossy and form stiff peaks.
- Scoop the meringue onto the top of the pie filling then, with a spatula, spread the meringue evenly over the filling, sealing to the edge of the crust.
- Place the top rack of the oven in the middle and preheat broiler to high. Put the pie under the broiler and cook until browned, about 1 minute. Watch the meringue closely as it can go from browned to burnt quickly.
- Let cool. Either serve immediately or refrigerate until serving time.
Nutrition
Have you tried this recipe? Give it a star rating and let us know your thoughts in the Ratings & Reviews section below.
This sounds delicious and the photos are styled beautifully.
Thanks Sean!
Perfect for Mother’s Day as my mom is coconut obsessed. Kinda wish I was eating it right now, I’ll just have to test it a few times before then ;)
Pingback: Gluten Free Buttermilk Chess Pie | Recipe | Simply Gluten Free
Pingback: Gluten Free Creamsicle Pavlovas Recipe | Simply Gluten Free
Just found this on your website. I never had Coconut Cream Pie till I was an adult. This was before I developed my allergies. I told my husband, “No wonder the Castaways didn’t want to leave Gilligan’s Island if they were eating Coconut Cream Pie everyday !”.
I just made this. It looks yummy, but my custard seems very loose now that I added the whipped cream. I used cold coconut cream which I was told is the same thing? I’m afraid it just won’t set, looks more like pudding ☹ stil tastes yummy though! Oh, and watch broiling at the end, mine burned so fast, I had to peel off the top layer and watch it really close, took 20 seconds! That’s why the topping isn’t too the edges! It won’t let me post a pic, sorry!
Hi Carrie,
I’m glad it still tastes good but I’m sorry the texture didn’t come out right.
For this recipe you should be using only the solidified coconut cream that rises to the top of the coconut milk cans when they’ve been chilled. If the coconut cream you used isn’t as thick as what the solidified coconut milk cans would give you, then that might be the issue. Did you use the liquid part of the coconut cream?